
As the reality of not being able to come to Church on Easter Sunday has set in, I’ve felt like it’s more important than ever that my home (especially the room where my family will be celebrating Mass) is decorating for Easter, just like the Church will be. Unfortunately, I didn’t have a lot on hand besides a table cloth and centerpiece for my dining room table so I’m seeing what I can create and sharing it with all of you.
I hope you find this fun and helpful. Part of this challenge is about using what is already on hand so please substitute as need. Branches from your garden can fill in for craft sticks. Hot glue can be substituted for wood glue.
When you’re finished, share a picture with us on Facebook!


Step 1
Print the template and tape it together. This is the outline for the inside of the bunny. When you place your craft sticks, place them on the outside of the line. Due to differences in craft stick size, you may need to make a few adjustments or overlap your sticks more.
Step 2
Arrange the first layer of sticks before glueing anything to make sure it all fits. The design uses full length craft sticks and those cut in half (or you could use mini craft sticks). I overlapped the ends of the sticks a little less than half an inch. The layers will not be flat - every other stick will be flat and the sticks in between them will be glued on top. Where the ears connect this pattern will need to be adjusted. I have the tops of the inside of my ears as “under” pieces and decided to put the right ear stick over the left ear stick.
Step 3
Start glueing! I used wood glue that applied with a q-tip to glue everything together. Just glue around and around the bunny, one layer (every other stick) at a time until you’ve reached your desired thickness. Mine is about 16 layers (so 8 sticks deep at each section). Press and hold each tick for a couple of seconds to insure a tight bond. Let dry for at least an hour or overnight.
Step 4
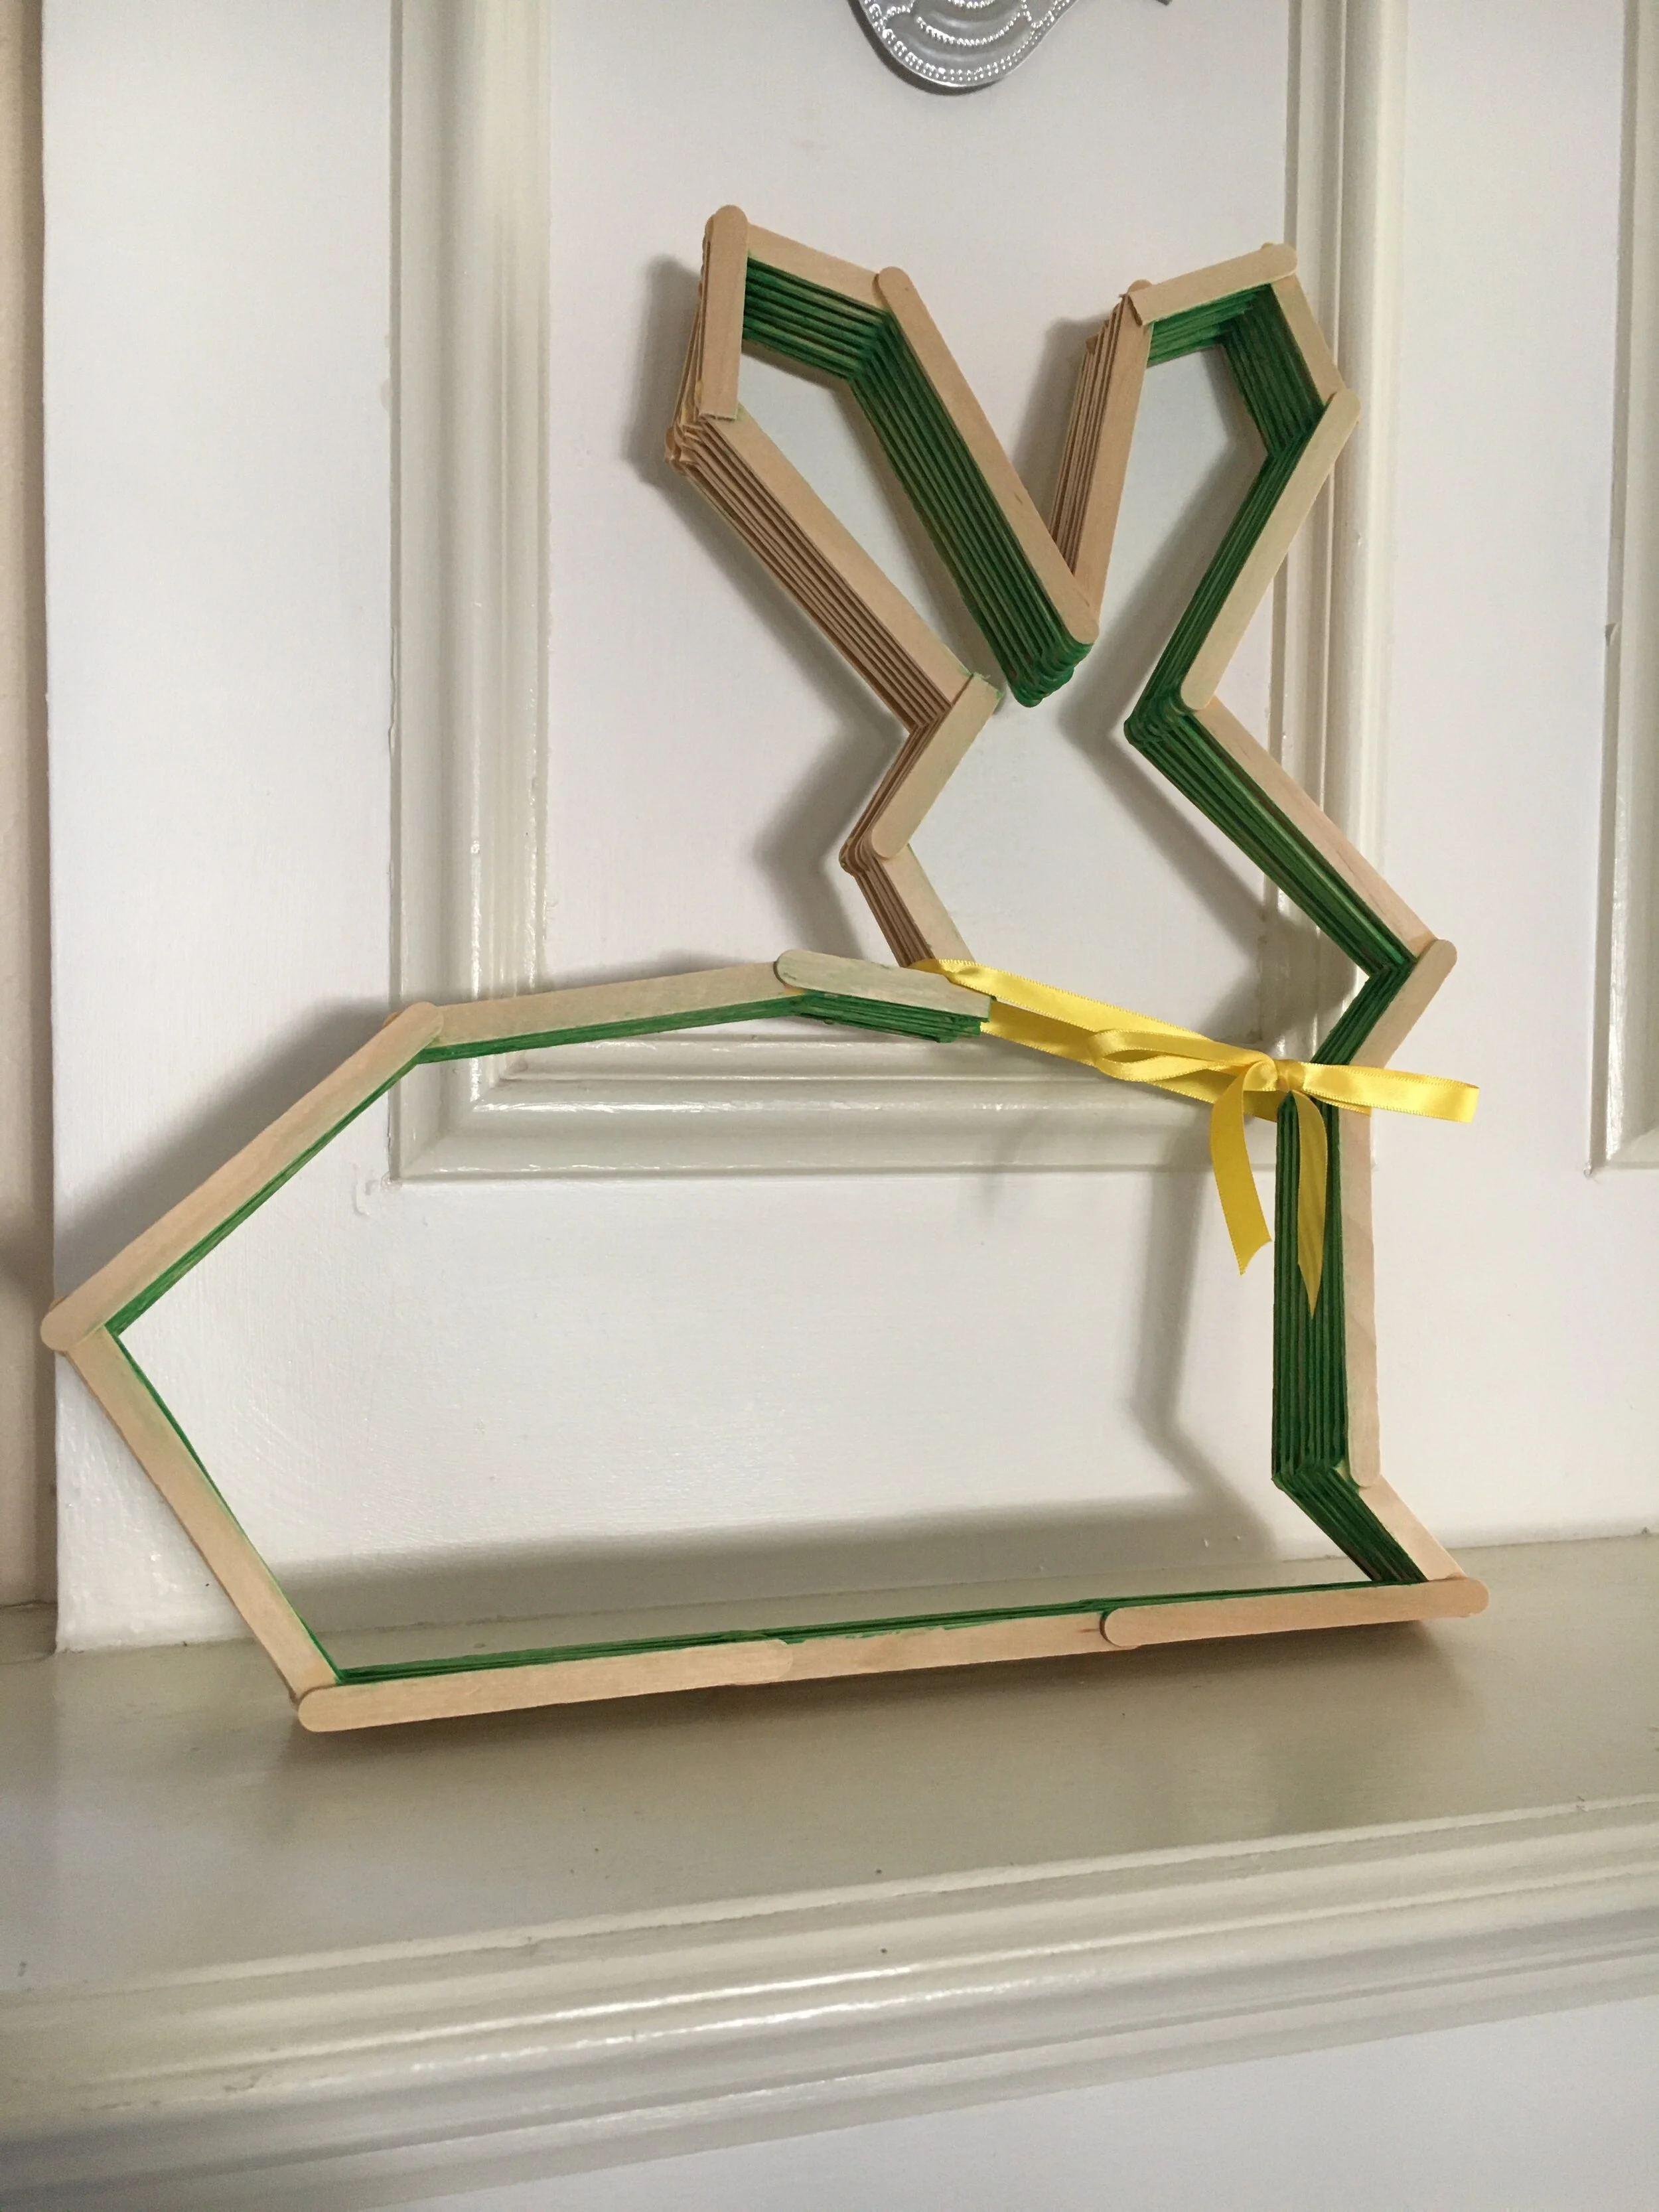
Decorate your bunny. You can paint or stain your bunny or leave it plain. I painted the inside of my bunny green using poster paint I had on hand. Feel free to add a tail using more craft sticks or making a pompom out of yarn.
Step 5
Tie a ribbon on the neck of the bunny.
Finished!
Let me know if you try this and how it works for you! Have a project to share with the Parish? Send instructions and pictures to me at Audreyg st stjoegold.org.
Please remember to use safety equipment when needed.